There are things that I once explained in a book and then copied and pasted them into a dozen other books and then thought to myself “Everyone has really got that down pat now, I don’t need to go over it again”.
And then I realise: Nope.
Of course, I could then say: “Look at my “masterclass”Meisterschule”, I already covered this in 2010.” Nobody does, of course. Printed, edited books are no longer sources in this day and age. (I presented the first crowdfunding platform at the book fair in Frankfurt in 2000. We had a press conference and dozens of newspaper articles. They just can’t all be found online, so everyone thinks “Wagner is telling the story about the horse again.”) Enough preamble. What’s the deal with diffraction-limited lenses?
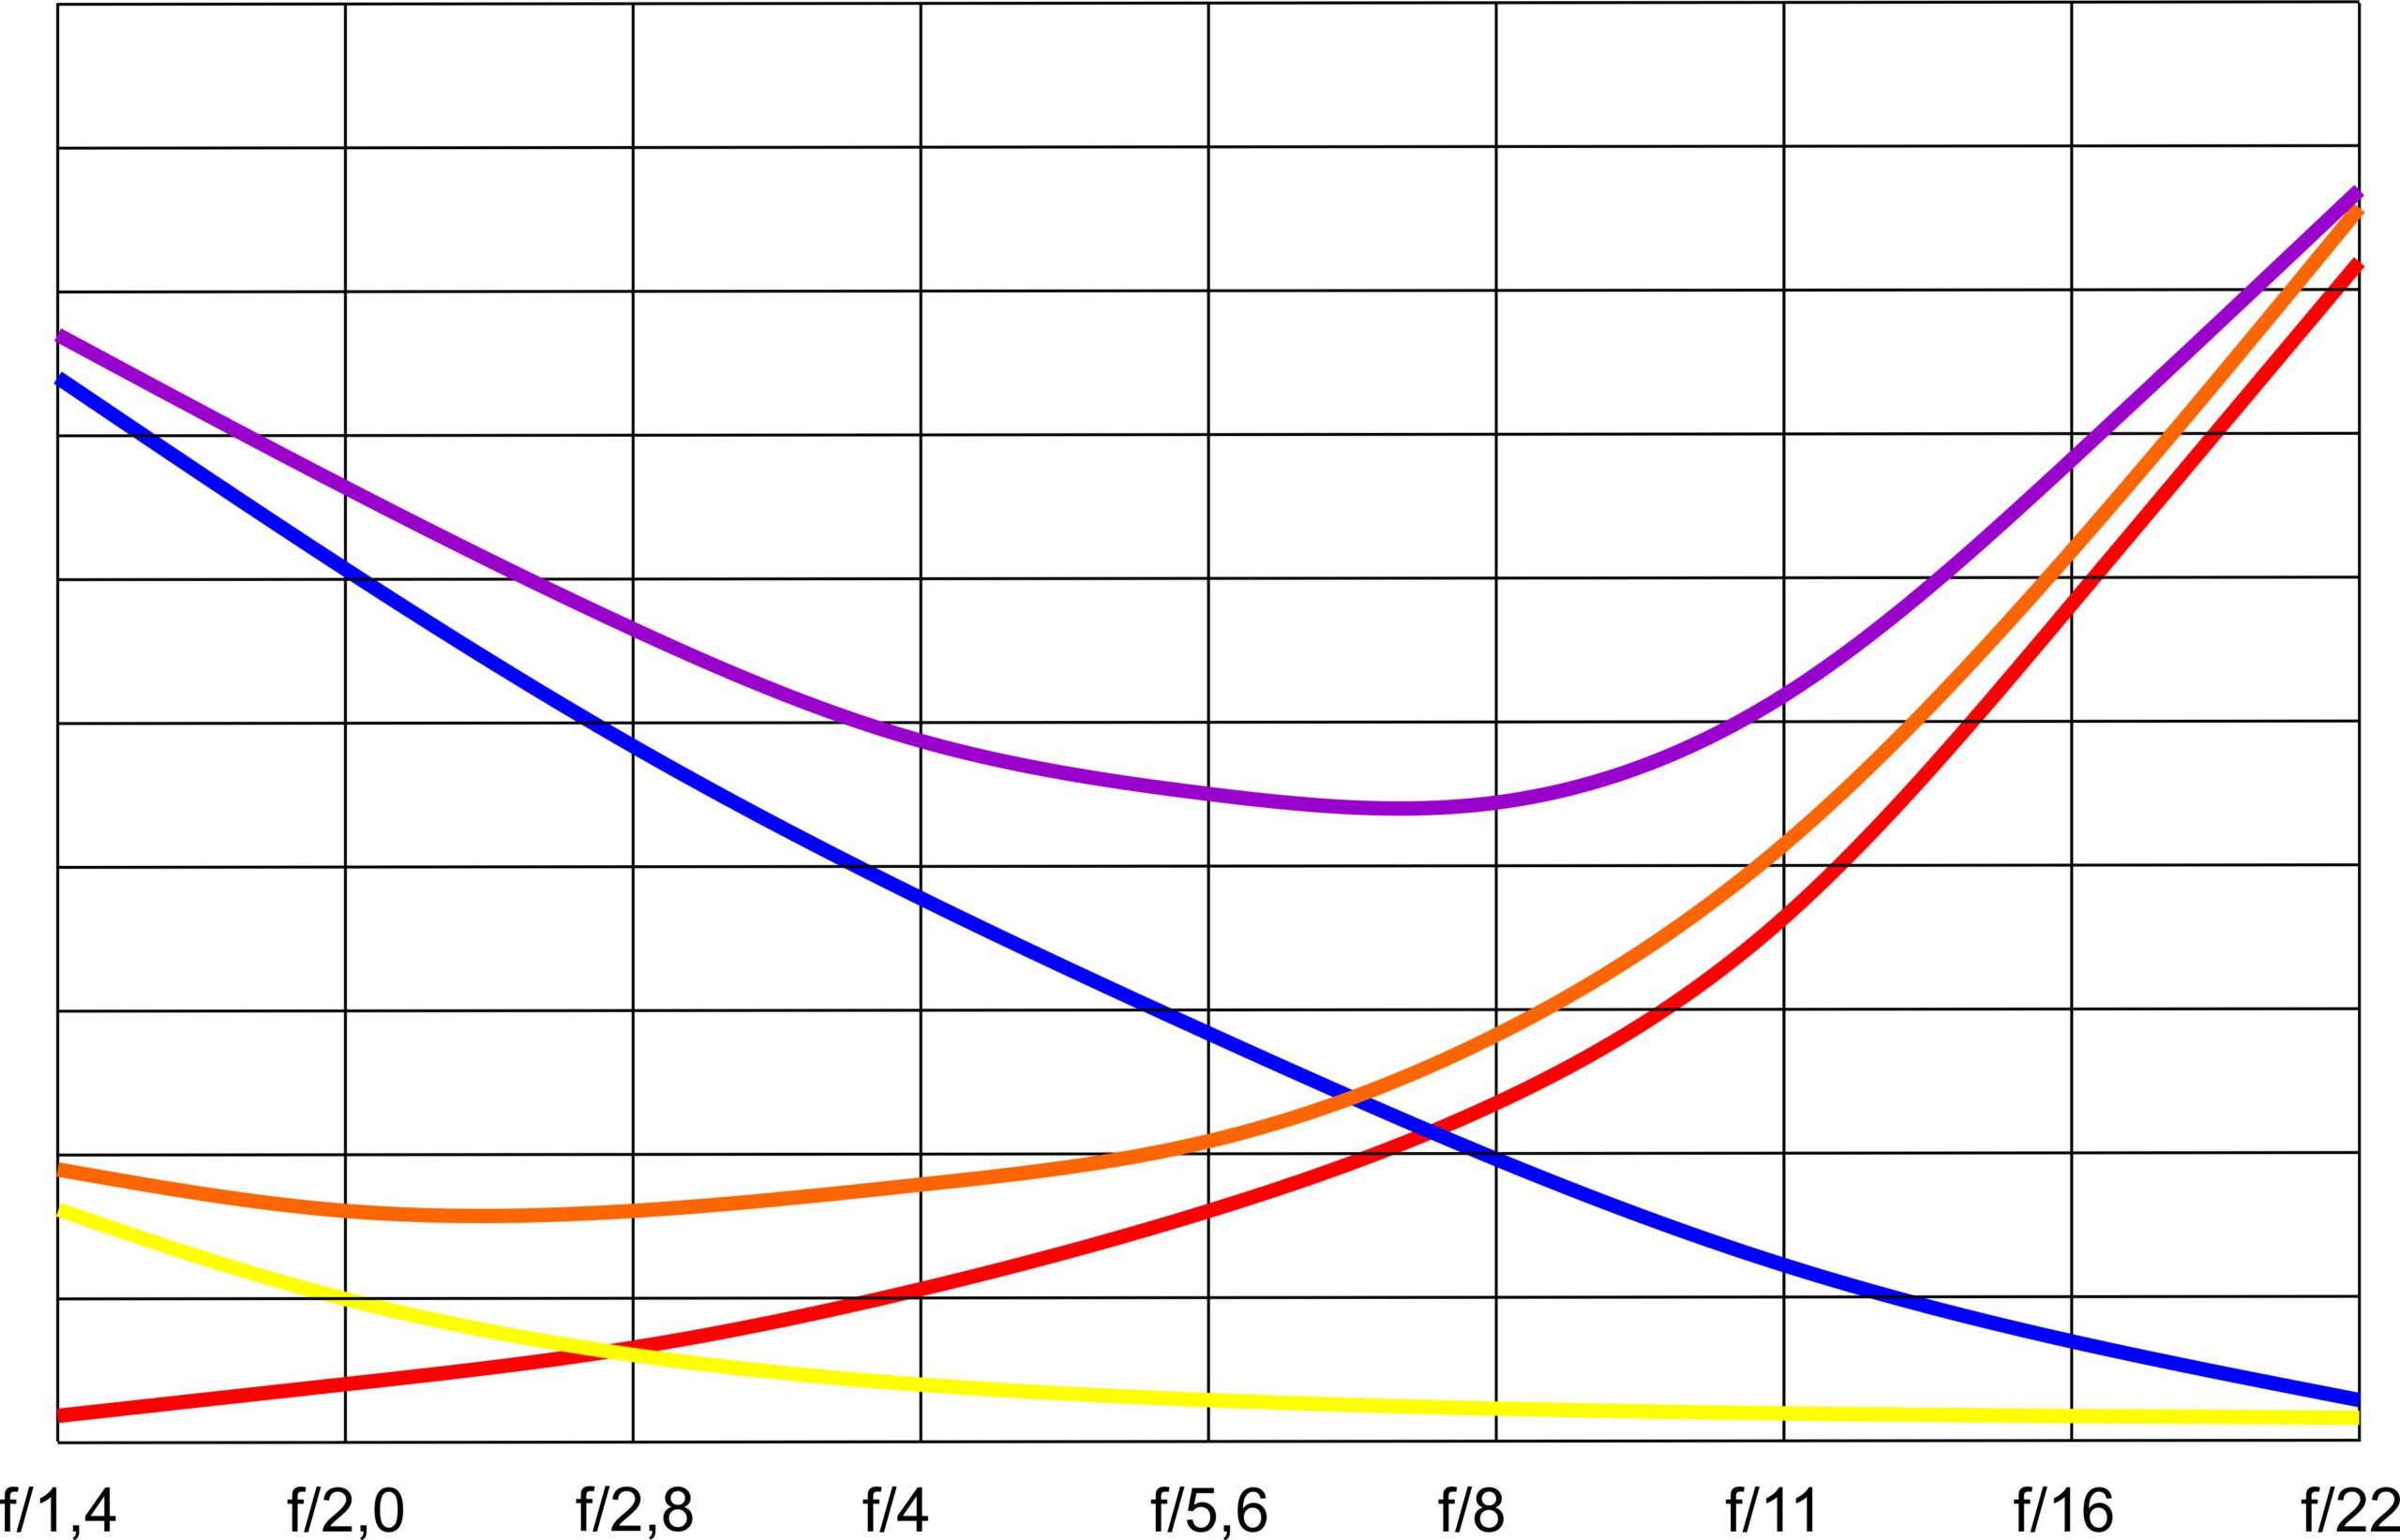
The title picture is a funny colourful graphic, with a yellow line and a blue line. The yellow line is the aberration of a good lens, the blue line is the aberration of a bad lens. With both lenses, the aberrations are reduced by stopping down.
The red line is the aberration caused by diffraction. This increases as the lens is stopped down.
The orange line is the sum of yellow and red, the purple line is the sum of blue and red.
The lens provides the best image when the sum of both errors is the lowest. These curves are familiar from the various lens tip diagrams. And as you can see, the “good” lens is already “worse” at f/4, the bad lens only at f/11.
With a “diffraction-limited” lens, the increase in error due to diffraction is greater than the improvement in the image due to stopping down. The lens therefore becomes “worse” each time it is stopped down.
Yes, do such lenses even exist? Yes, Rodenstock, for example, has brought out such a lens for specialised cameras. It has an aperture of 5.6, which is a simple way – simply stop down the aperture so far that you are already on the upward curve again.
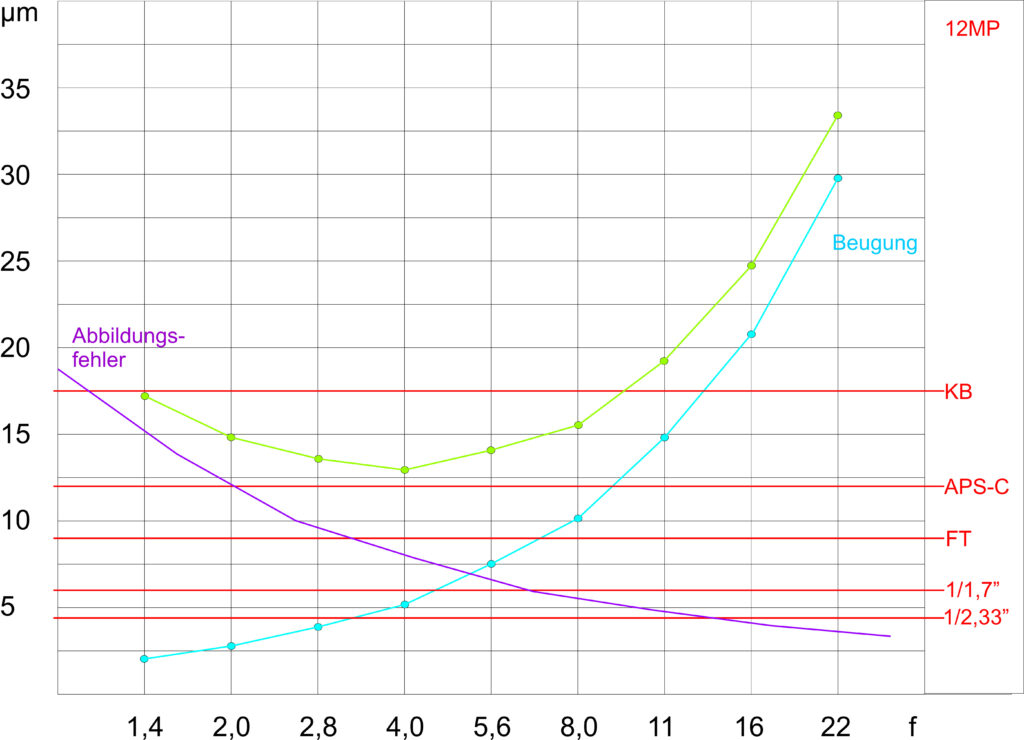
Incidentally, the graphic is very “pi-thumb”, in the “Meisterschule” I still provided it with a scale for the diameter of the circle of confusion – and that’s where the number comes from that I once wrote that the limit for mFT is 6.3. That was for 12MP. At 20MP, the limit is around 5.6, above which diffraction has an effect. Since this is a function of the pixel pitch, we are also at 35mm and 40MP at aperture 6.3…..

Do I see any readers hyperventilating? Fortunately, there’s a cool trick to prevent anyone noticing the diffraction: you take nice pictures. Then nobody looks at the diffraction.
That’s why I’m such a fan of mFT and Olympus lenses. They are all suitable for open apertures. The depth of field is usually sufficient even with an open aperture, I’m not interested in diffraction and I can take my pictures in a relaxed manner. But you can also see from this graphic what happens when you suddenly want to accommodate 47MP on FT – the pictures don’t get any better.
And you can also see how important it is to have fast zooms. Especially with mFT. Of course, you can calculate out the effects of diffraction within limits, but it will never be really good. And even with 35mm they can’t get round the physics – it’s just much more complex to build fast zooms. The idea of putting 60MP on the sensor for 35mm and then stopping down the lens to 8, because that’s where it has its best performance – more like half-baked….
Danke für die Auffrischung unserer Kenntnisse! Mir war nicht bewusst, dass Beugung schon derart früh die Bildqualität mindern kann. Ich habe die Rattenschärfe von 12-40 und 12-100 bei Blende 4.0 bis 5,6 einfach auf die Güte des Objektivs und eine präzise Scharfstellung meinerseits geschoben.
Was die Offenblendtauglichkeit von mFT und Olympus-Optiken angeht, ist das aber wohl kein Alleinstellungsmerkmal mehr. Seit Einführung der Spiegellosen bei C+N scheinen auch deren Objektive und die von Sony und sogar die von Drittherstellern von Viltrox und Samyang immer besser zu werden, wenn man Testern/Influencern glaubt. Ich hatte von Sony das FE 24-105 f4.0 ca. 6 Monate im Praxiseinsatz und war ziemlich baff, was das schon bei Offenblende konnte.